How To Correct and Update Employee Work Schedules
Use the HIP system to update your employees’ schedules from the Manager Self-Service (MSS) screen.
By default, employees will be assigned the general Monday – Friday 8-hour work schedule. If the employee’s work schedule is different than the default, you can edit that schedule using the Assign Work Schedule tile in the HIP system.
STEPS
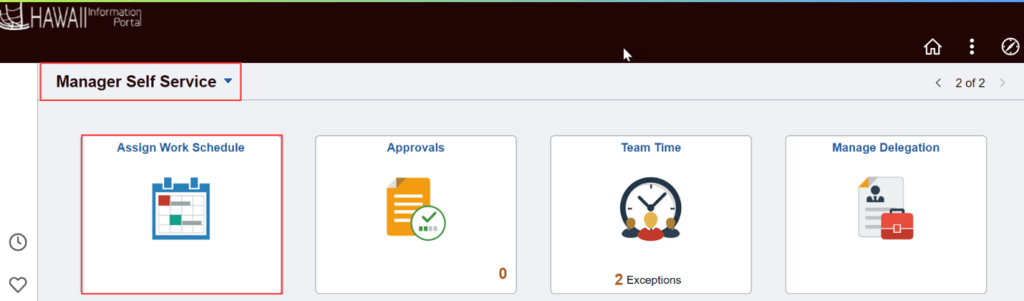
1. Login to the HIP portal and navigate to your system role in the upper left-hand corner.
2. Click on the Manager Self Service option from the drop-down menu and from the MSS screen, click on the Assign Work Schedule tile. NOTE: if the tile does not exist, you may also navigate to the page with the following path: NavBar (compass icon) > Navigator > Menu > Manager Self Service > Time Management > Manage Schedules > Assign Work Schedules
3. Enter the EMPL ID and click the “Search” button.

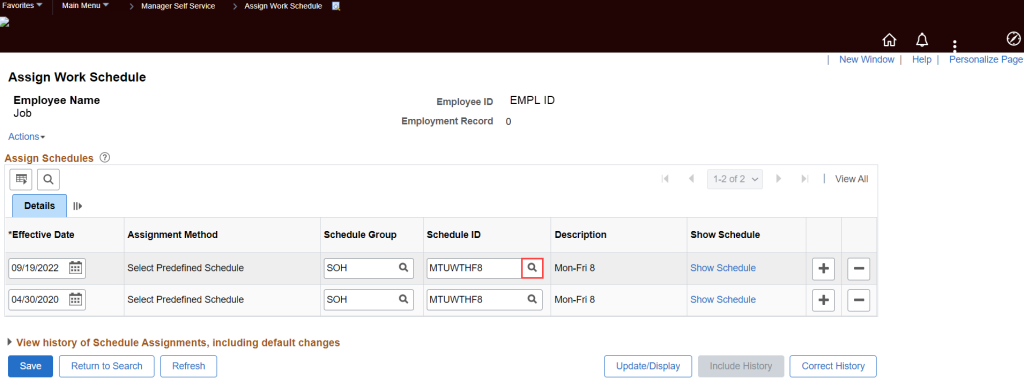
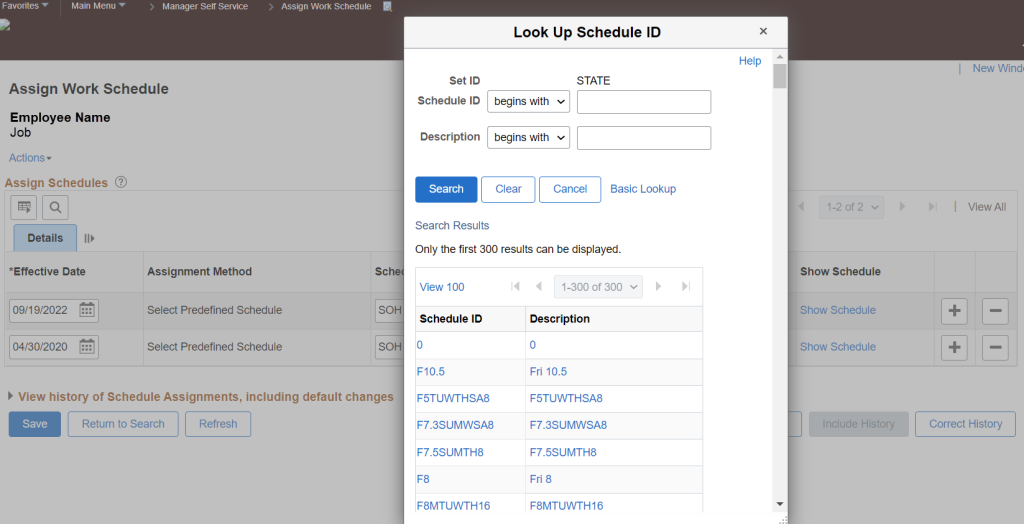
4. The employee’s assigned work schedule will appear, to update the employee’s currently assigned work schedule, click on the “Correct History” button. To make changes to the effective date of when the assigned work schedule should be active, click on the calendar icon or enter a date in the *Effective Date field. To correct the employee’s assigned schedule, click on the magnifying glass icon in the Schedule ID field to select a different schedule. NOTE: When correcting effective dates, a work schedule with an effective date equal to the employee’s hire date must remain on the Assign Work Schedule screen. This ensures the employee has access to their Timesheet corresponding to the appropriate time periods that they are an active Time Reporter.
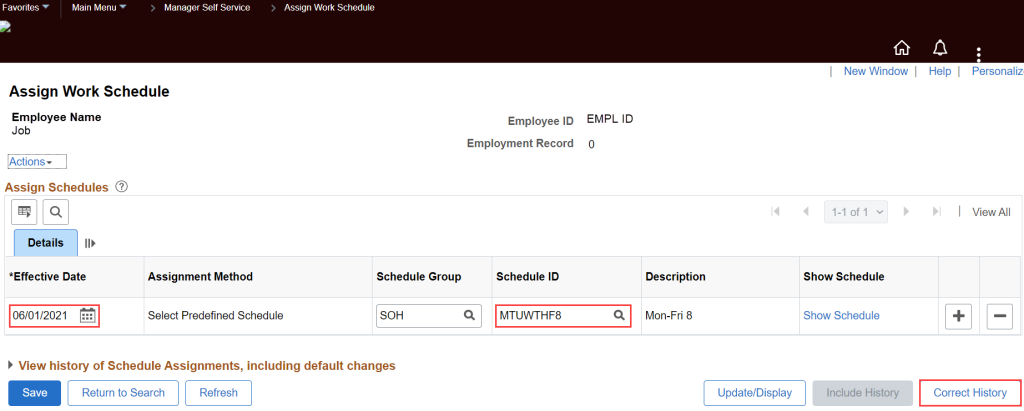

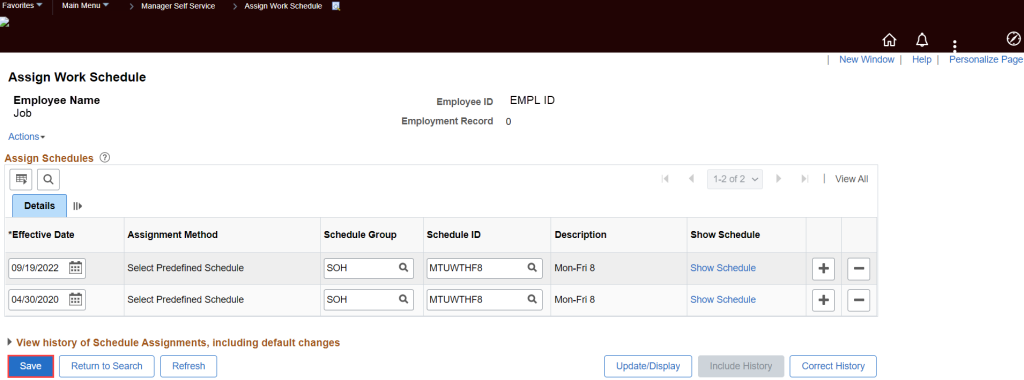
5. When you’ve made the necessary corrections, click the “Save” button to save the changes that were made.
STEPS
1. Login to the HIP portal and navigate to your system role in the upper left-hand corner.
2. Click on the Manager Self Service option from the drop-down menu and from the MSS screen, click on the Assign Work Schedule tile. NOTE: if the tile does not exist, you may also navigate to the page with the following path: NavBar (compass icon) > Navigator > Menu > Manager Self Service > Time Management > Manage Schedules > Assign Work Schedules
3. Enter the EMPL ID and click the “Search” button.
4. The employee’s assigned schedule will appear, to assign the employee a new schedule, add a new row by clicking on the “+” icon.
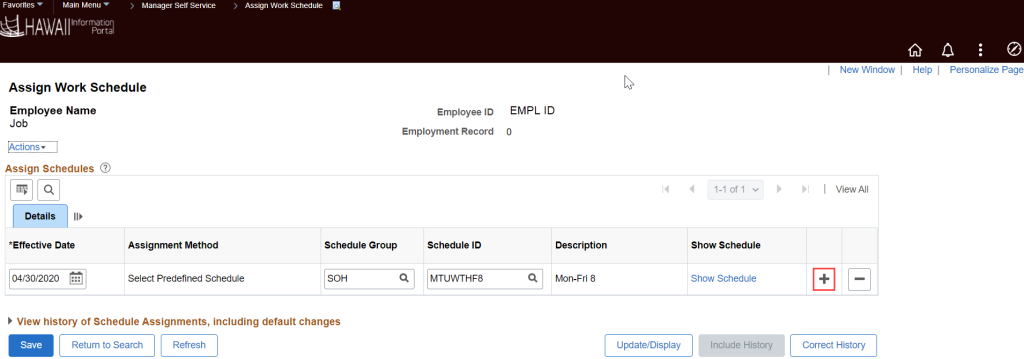
5. The new row will appear at the top. NOTE: The newly created schedule effective date will default to the current date. Make sure to change the *Effective Date to the correct start date this schedule should be active for the employee.
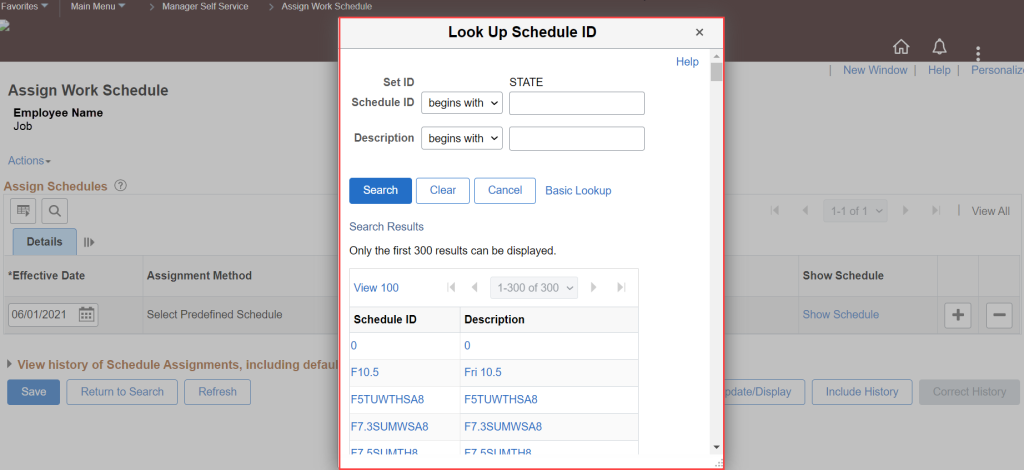
6. Click on the magnifying glass icon in the Schedule ID field to search for the new schedule to assign to the employee. NOTE: If the schedule does not exist, please work with your division Timekeeper to make a Salesforce ticket to have a new schedule created.
7. You can also confirm the correct schedule has been selected by clicking on the Show Schedule link. You will be able to see how the new schedule looks for a specific work week/date range.
 8. If the new schedule looks okay, click on the “Save” button to confirm assigning it to the employee.
Click here to view a quick reference guide about updating employee work schedules.
Click here to view a quick reference guide about how rotational schedules work in HIP.
NEED HELP FAST?
Click here to find your Time or Leave Keeper.
RELATED ARTICLES
Introduction To Time & Labor (T&L) Manager Self-Service (MSS)
Security Access For Supervisors
How To Approve Time And Leave Requests
Last Updated: September 19, 2022
Tags: Assign Work Schedule, Employee Work Schedule