Using The Rapid Time Screen
Use the HIP system to quickly enter or change hours for a group of employees through Rapid Time.
The Rapid Time screen is available for Timekeepers to quickly enter hours for multiple employees at once as opposed to going to each employee’s Timesheet individually. You’ll choose from pre-defined templates and processing modes to add, correct, or replace hours for your employees.
You can find the Rapid Time screen by navigating through your Time and Labor WorkCenter or NavBar, click the following link to view a helpful article on the different ways to navigate to your Timekeeper screens.
STEPS
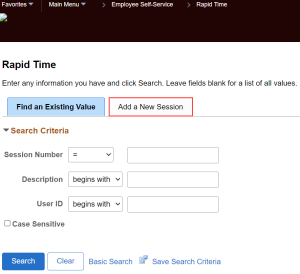
1. From the Rapid Time search screen, click on the “Add a New Session” tab.
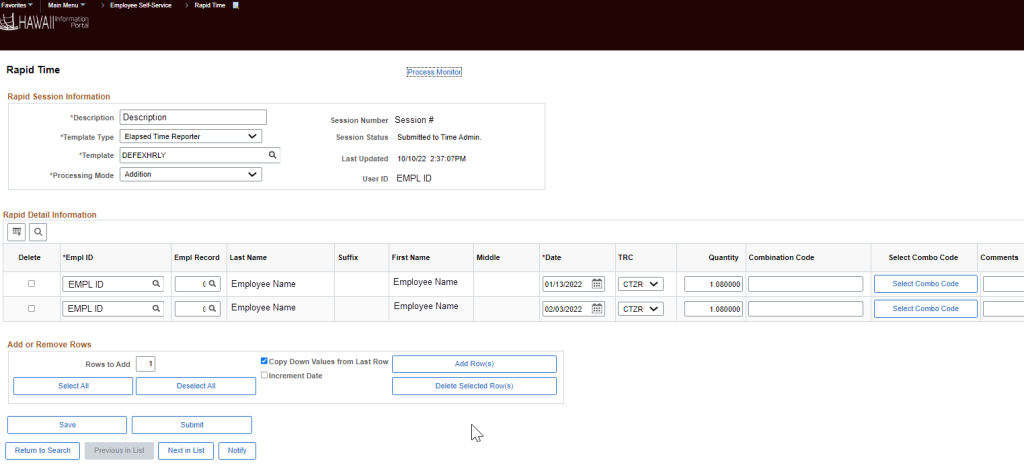
2. The HIP system will generate a new Rapid Time session where you can define the session templates and select a processing mode. Then enter EMPL ID/EMPL RCD, TRC, hours, quantity, or dollar amounts and UAC if necessary to submit.

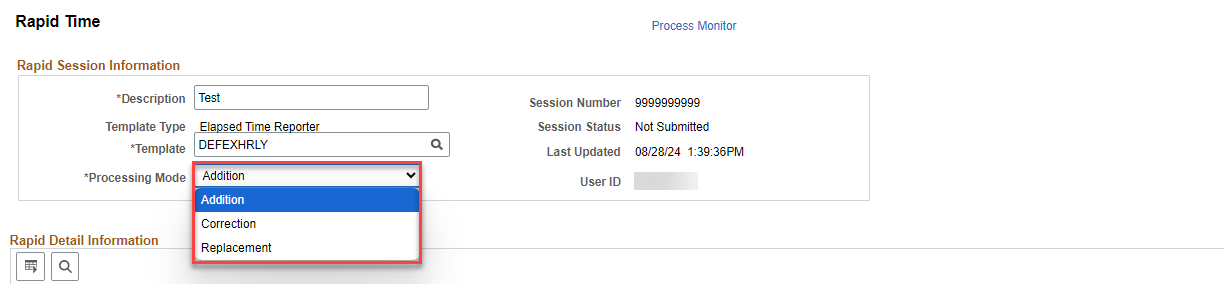
3. Complete the Rapid Session Information section.
- a. DESCRIPTION - Add a description to your Rapid Time session for reference.
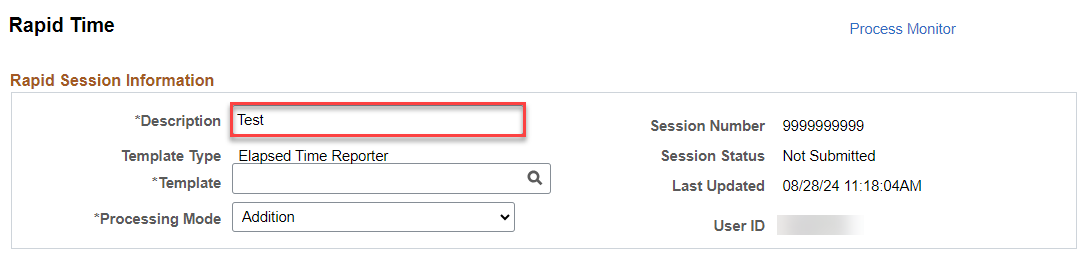
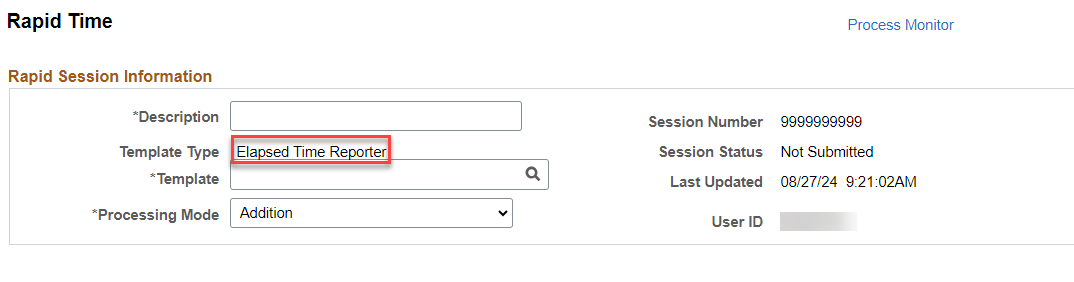
- b. TEMPLATE TYPE - This will auto-default to be "Elapsed Time Reporter".
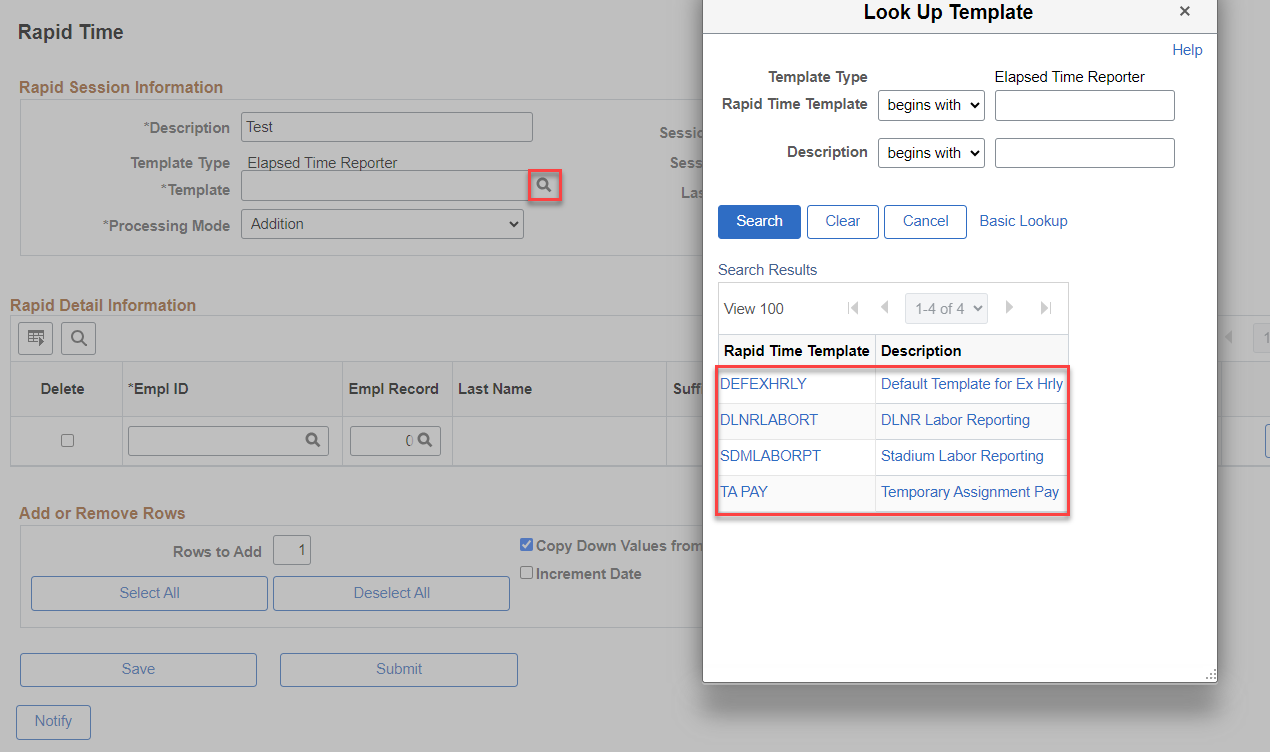
- c. TEMPLATE - Templates are pre-defined to allow certain fields to be entered. The options will vary depending on the Template Type selected.
- DEFEXHRLY (Default Exception Hourly) – Generally used for most types of time.
- DLNRLABORT (DLNR Labor Reporting)
- SDMLABORPT (Aloha Stadium Labor Reporting)
- TA PAY (Temporary Assignment Pay)
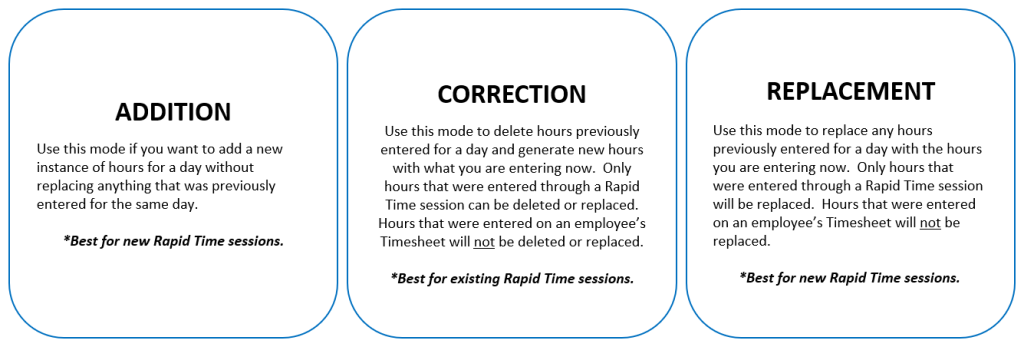
- d. PROCESSING MODES - Select an option from the Processing Mode drop-down menu. Options include:
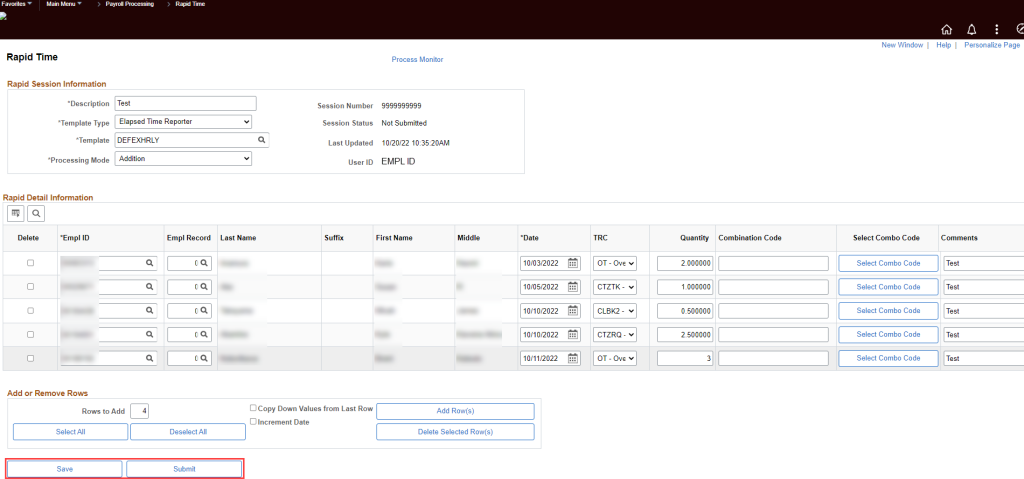
4. Complete the Rapid Detail Information section.
- a. EMPL ID – Employee ID
- b. EMPL Record – Some employees have multiple EMPL Records because they have multiple jobs or work for multiple companies/jurisdictions. Make sure to pick the correct EMPL Record that corresponds to your department.
- c. Date – Date the payment is for.
- d. TRC – Choose the TRC for the payment, options in the drop-down menu will only show available TRC for the employee.
- e. Quantity – Enter hours, dollar amount, or units/portions.
- f. Combination Code – Combo Codes correspond to specific UAC to charge for payment. NOTE: It is not necessary to enter a Combo Code if the UAC you need for the earnings type is the same as the base pay UAC or the UAC for the earnings is already setup on Job Data.
- g. Comment – Add a comment for reference.

5. Complete the Add or Remove Rows section.
- a. Rows to Add – This field defaults to 1, input the number of rows you want to add.
- b. Copy Down Values from Last Row – Check this box to duplicate the last row’s values for the rows you chose to add above.
- c. Increment Date – Check this box to increase the date by one day for each row added.
- d. Add Row(s) – Click this button to add the rows defined above to the Rapid Time session.

- e. Select All – Click this button to choose all rows for deletion.
- f. Deselect All– If you don’t want to delete, click this button to uncheck all rows for deletion.
- g. Delete Selected Row(s) – Click this button to delete all rows with the checkbox selected under the Delete column.


6. If you are not ready to submit, click the “Save” button to save your Rapid Time session data.
7. When you’re ready to submit your Rapid Time session, click on the “Submit” button.
8. A confirmation message will appear, click the “OK” button if you meant to add time and continue.

9. A confirmation message will appear notifying you the Rapid Time session has been submitted, click the “OK” button.

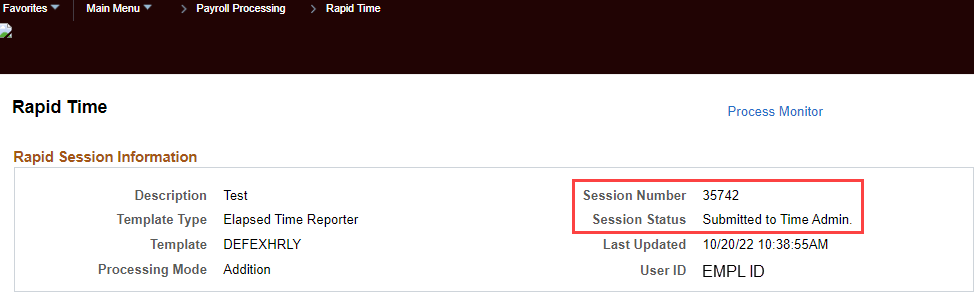
10. After successfully submitting your Rapid Time session, notice HIP has assigned a Session Number and Session Status has been updated to “Submitted to Time Admin.”.
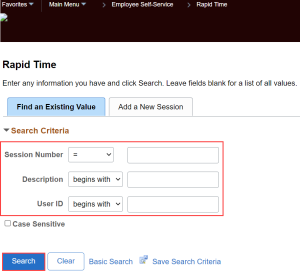
STEPS
1. From the Rapid Time search screen, enter parameters such as the existing Rapid Time session number, keywords from the existing session’s description, or EMPL ID of user who created the session.
2. Click the “Search” button.
If you click the “Search” button without entering any parameters, the HIP system will provide a list of existing Rapid Time sessions available to you. You can scroll through the list and click on the Rapid Time session you would like to review.
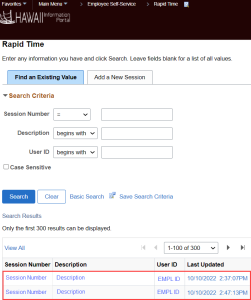
3. After clicking on the link, you’ll be taken to the corresponding Rapid Time session where you can review what was saved or submitted.
Click the following link to view and download a quick reference guide on Rapid Time.
RELATED ARTICLES
How To Enter Time For An Employee
How To Make Changes To Employee Time
Last Updated: November 27, 2024
Tags: Rapid Time, TA Pay